


How to optimize an application using basic concepts and cloud computing?
Published by


Gabriel Limoni
Published by
Gabriel Limoni
Published at
Categorias:
Although there is a great variety of modern cloud resources nowadays, it is common yet to have projects hosted in virtual machines. As a consequence, it takes a significant time to install the machine's settings, tools, and components, such as the operating system, database, SSL/TLS certificates, message brokers, cron jobs, and so on.
These machines can be highly-priced depending on the memory setting, CPU and storage. Besides the infrastructure cost, there might be other issues, such as
- Limited scalability according to the machine’s size (vertical scalability)
- Need for an infrastructure team to manage resources
- Security problems due to lack of updated tools
- General application unavailability due to flaws in any components
Especially for small teams, the time for infrastructure configuration, installation, and maintenance is super valuable. It could be used in the development of new features or in solving bugs, for example.
This article will show how to upgrade a Node.js application by applying basic concepts and cloud computing tools. Those are the addressed steps:
- Model Application: User’s API CRUD
- Database as a Service with MongoDB Atlas
- Dockerizing the application
- Hosting an API on Cloud Run with Github integration
- Testing the application on the cloud
- Conclusion and concepts summing up
1. Model Application: User’s API CRUD
The used application in this example is a simple User’s HTTP API CRUD developed in Node.js, located in this repository on GitHub. The main branch has a complete application. The main branch has the complete application.
In order to keep up with the article, you should fork this repository and add it to your GitHub account, since we are going to use it in the fourth step. If you want to use your own application it should work as well, as long as its exposed port can be accessed through the PORT environment variable.
2. Database as a Service with MongoDB Atlas
Database as a Service (DBaaS) is a type of service for cloud databases. In this case, the database is managed by the platform regardless of any settings from contractors. In simple words, it means you pay for a platform to manage the database infrastructure, having it ready for use in production.
There are many pros and cons in this database service model, but for small teams without a specialist, it can be helpful because it allows the team to focus more on developing the product and less on setting up tools.
Our application uses MongoDB, thus, we are going to use the Atlas platform which offers the DBaaS for Mongo. When accessing the link above, it is possible to create an account and a free-of-charge project cluster with up to 512MB storage - more than enough for the purposes of this article, casual testing, and even small development environments.
Having the cluster and project set up on Atlas, you can obtain the connection string (long version) of it and add it to a file named .env at the root of our application, like this:
MONGO_URI=mongodb://user:password@my-urlNow, our application is ready to be executed! If you want to run some tests, at the repository readme there are some cURL commands to simply consume the API endpoints.
3. Dockerizing the application
Nowadays, one of the most used tools is Docker which allows isolating applications in containers. Containers can be defined as isolated software packages that can be reliably executed in every environment or operational system. If you need a Docker installation, check out this link.
For this article, we are going to focus on how to use Docker to isolate our application and all its dependencies in one image, so it can be run in any environment.
On this link, Docker’s team deepens into definitions and contents about containers, Images, and comparison with Virtual Machines - the reading is recommended to learn more about the concepts.
Once Docker is installed, let's create our image. Firstly, let’s create a file called Dockerfile Dockerfile in the application root.
FROM node:16

WORKDIR /app

COPY package-lock.json .
COPY . .

RUN npm ci

CMD ["npm", "start"]
Explaining the coding line above:
FROM node:16- states the base image used in the making process of our own image;
WORKDIR /app- defines the root directory inside of the used container. It can be any other name, but the most common is/app;
COPY package-lock.json .- copies thepackage-lock.jsonfile for the containers root directory - in this case the/app, because we have made it as the base directory;
COPY . .- copies all files to the containers root directory (same behavior as the previous command);
RUN npm ci- installs the application dependencies;
CMD ["npm", "start"]- the command that will be executed when the container runs, basically it starts the application.
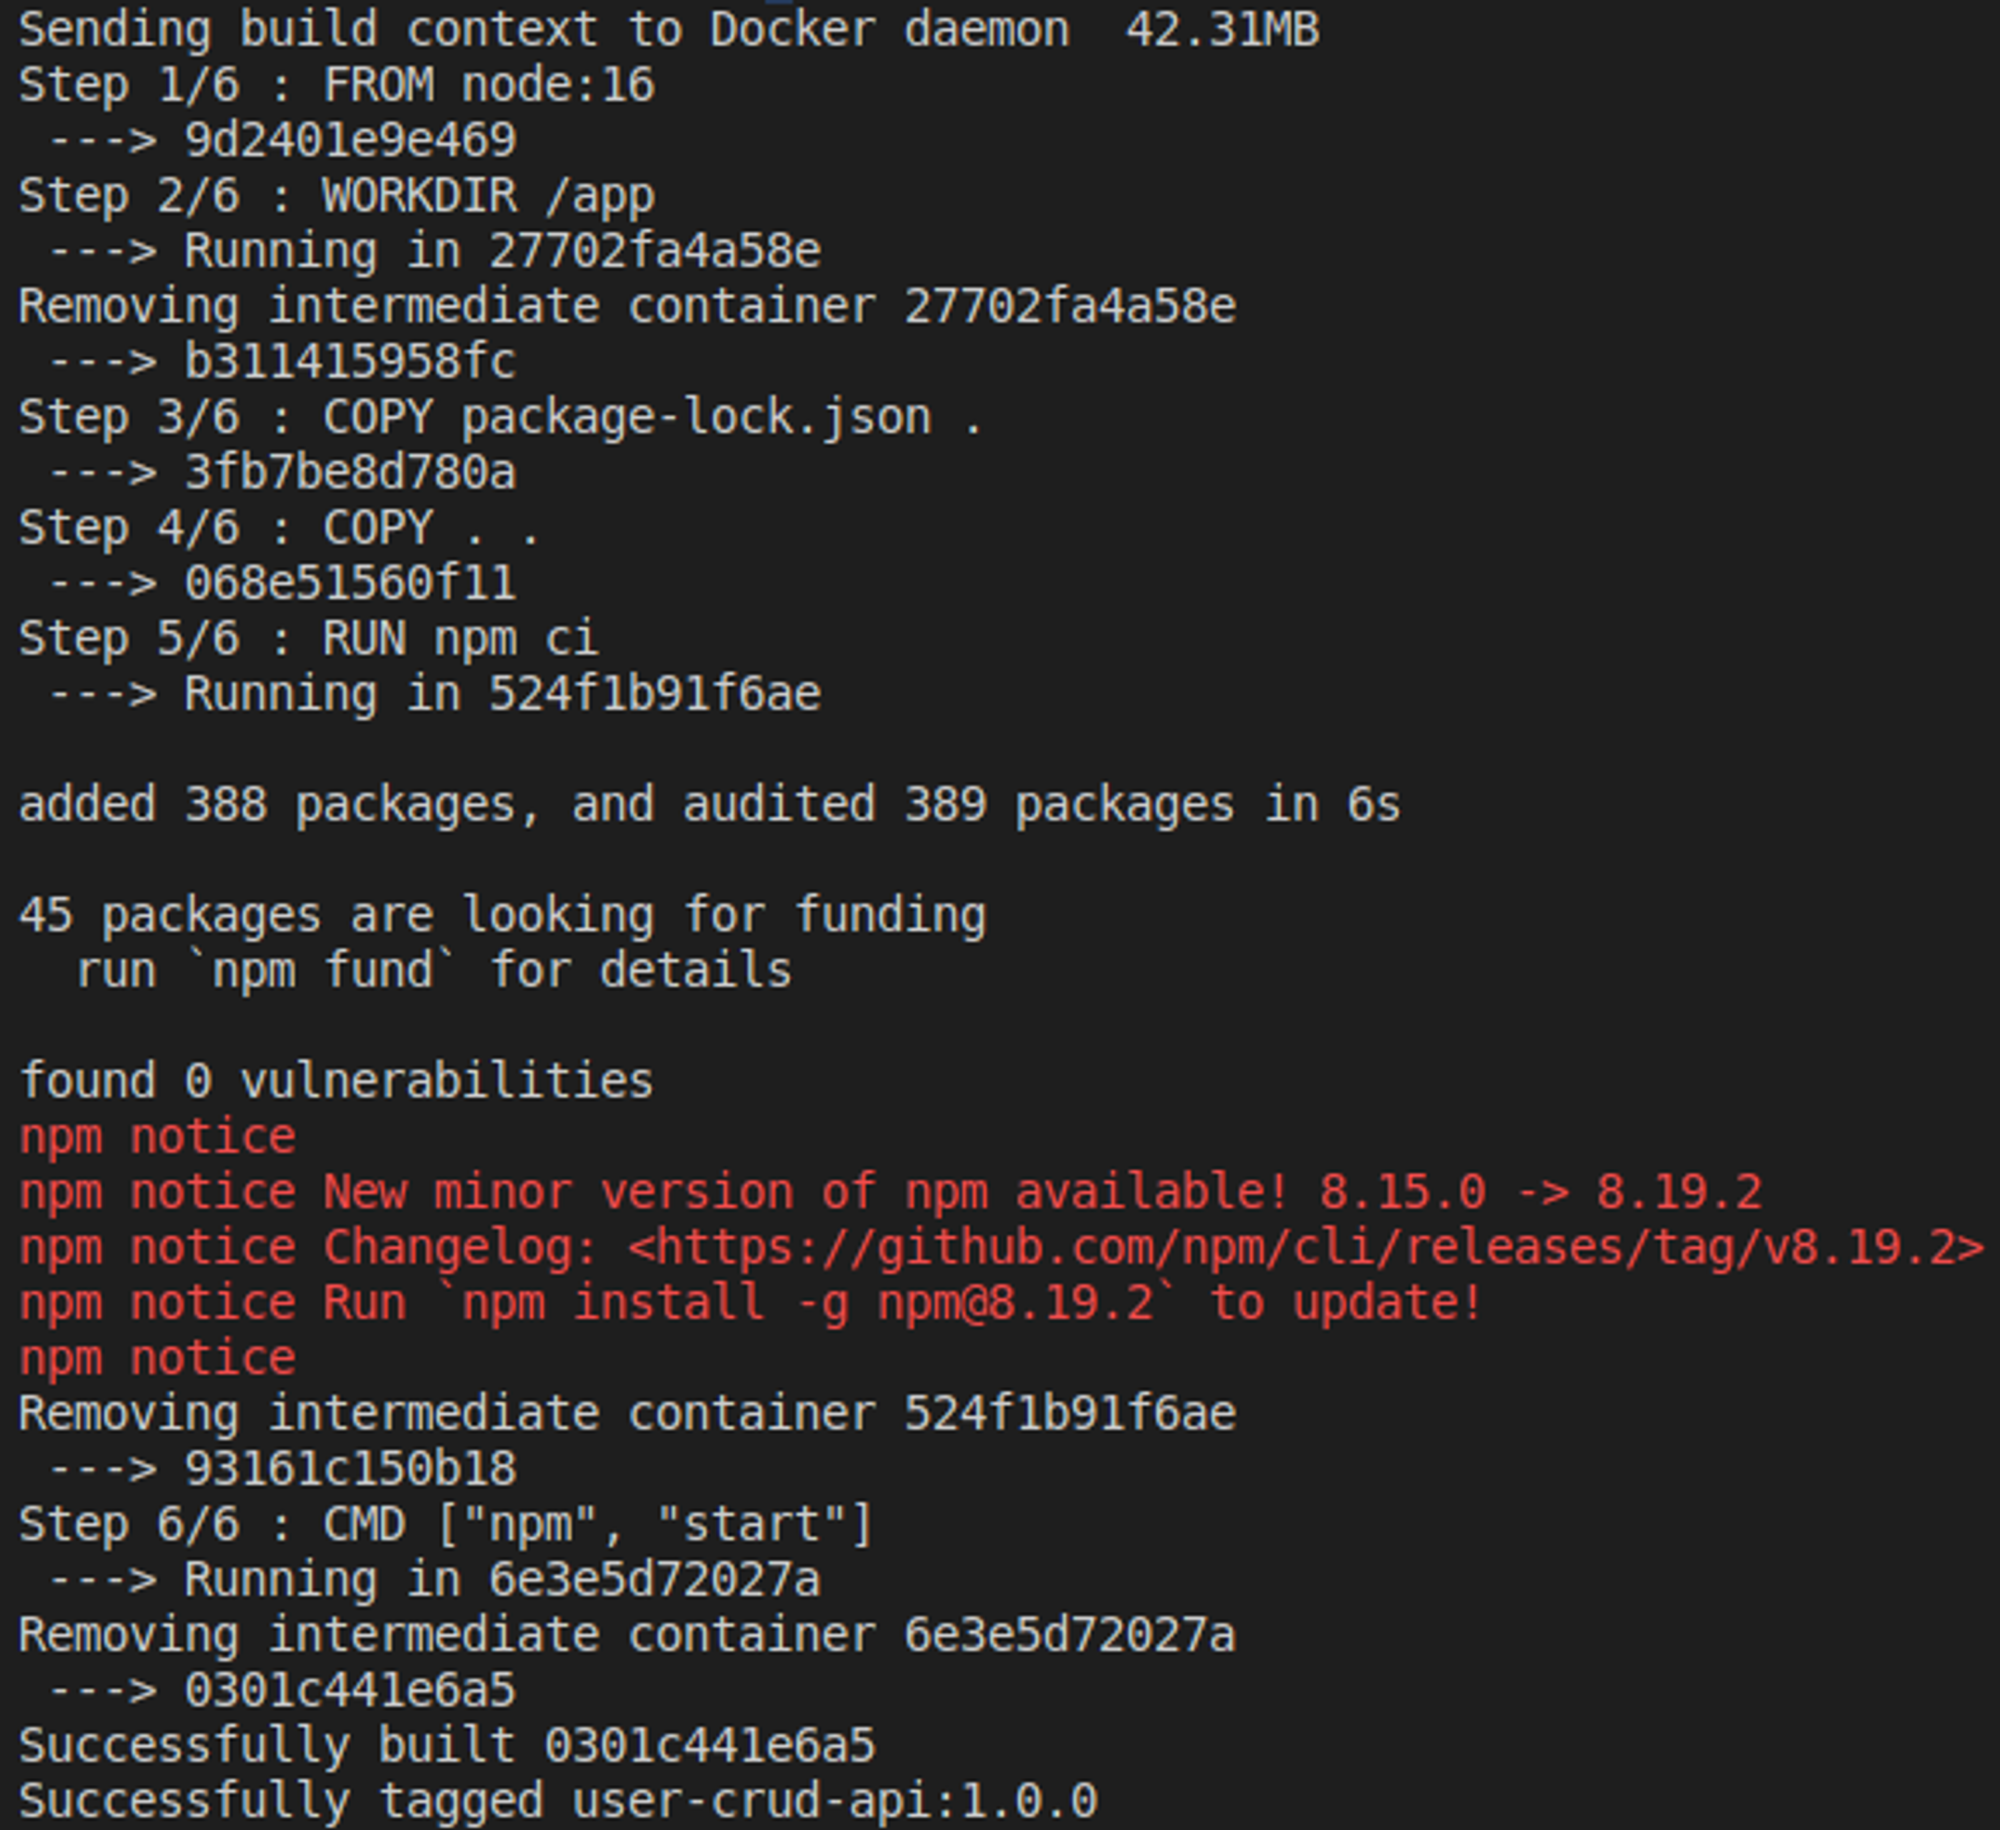
With the Docker correctly settled up, now the image can be created using the following command: docker build . -t user-crud-api:1.0.0. This command builds an image based on the Dockerfile that had been configured in the project root. This image is called user-crud-api having a 1.0.0 tag. The command should return something like this in the console:
If everything is good, now the encapsulated application in a Docker image, ready to be executed! To check if it is really there, run the following command: docker image ls user-crud-api. It should return the list of images:

To execute the container, in fact, run the following command: docker run -p 3000:3000 user-crud-api:1.0.0.
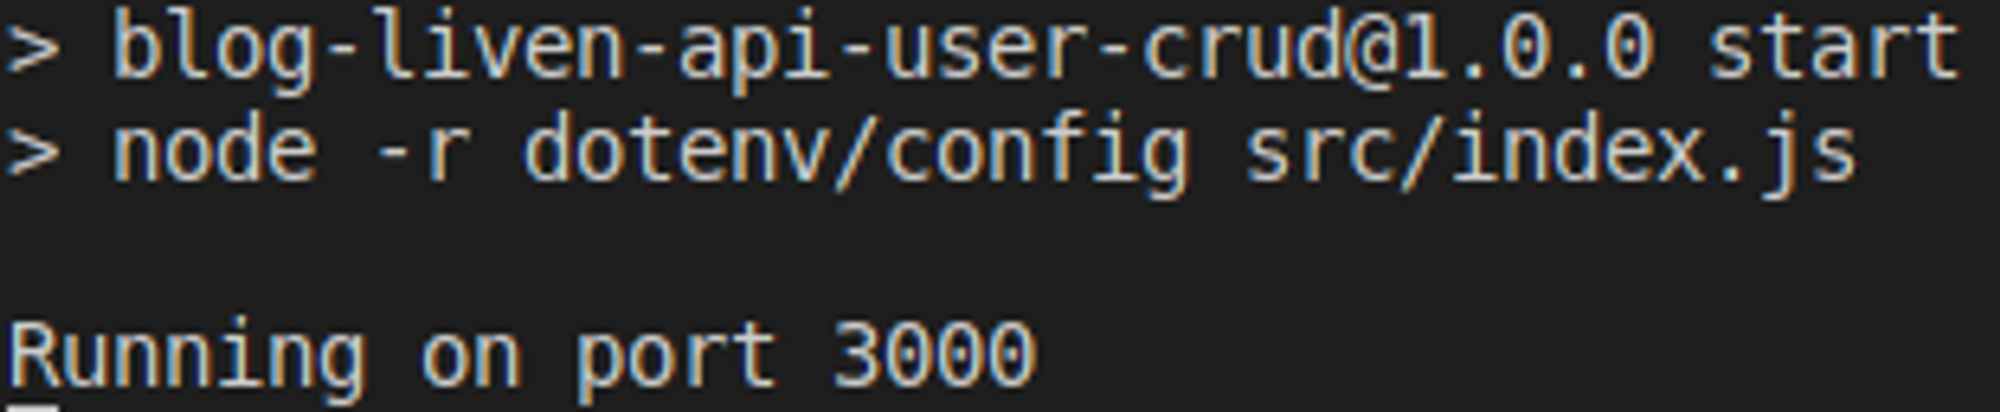
This command executes a user-crud-api:1.0.0 image and makes a connection between the 3000 gate of our machine and 3000 docker’s gate through the -p. For safety reasons, Docker does not expose the container gates, which is why the flag is necessary.
The application can be tested by creating a command curl -d '{"name": "Limoni", "email": "limoni@mail.com"}' -H "Content-Type: application/json" -X POST and then listing the users: curl http://localhost:3000/user.

All set! Our application is running inside a Docker image completely isolated from the operating system.
4. Hosting an API on Cloud Run with Github integration
Now that the application is encapsulated in a container, let’s make it run in the cloud. In this article, we use the Google Cloud Run, for that reason we need to create an account and a project at Google Could Platform (GCP) with the payment option checked (there might be a need for a credit card to proceed, but you will not pay anything). On this link, you can create an account using your Gmail.
Basically, the Cloud Run is a GPC resource that allows a self-managed application host throughout Docker container images. You only pay for the used computation and there is a generous amount free of charge that you can check out at the GCP pricing list.
This kind of service is known as serverless or Platform as a Service (PaaS), just like DBaaS, where you pay for a platform to manage your basic infrastructure, which allows you to focus on developing features.
To set Cloud Run, the simple way is to integrate it directly to GitHub and let that Cloud Build (build tool for applications in the cloud by GCP) takes care of generating the docker image and deploys it. Right above, there is a step-by-step list of how to set the Cloud Run with GitHub and Cloud Build, check it out:
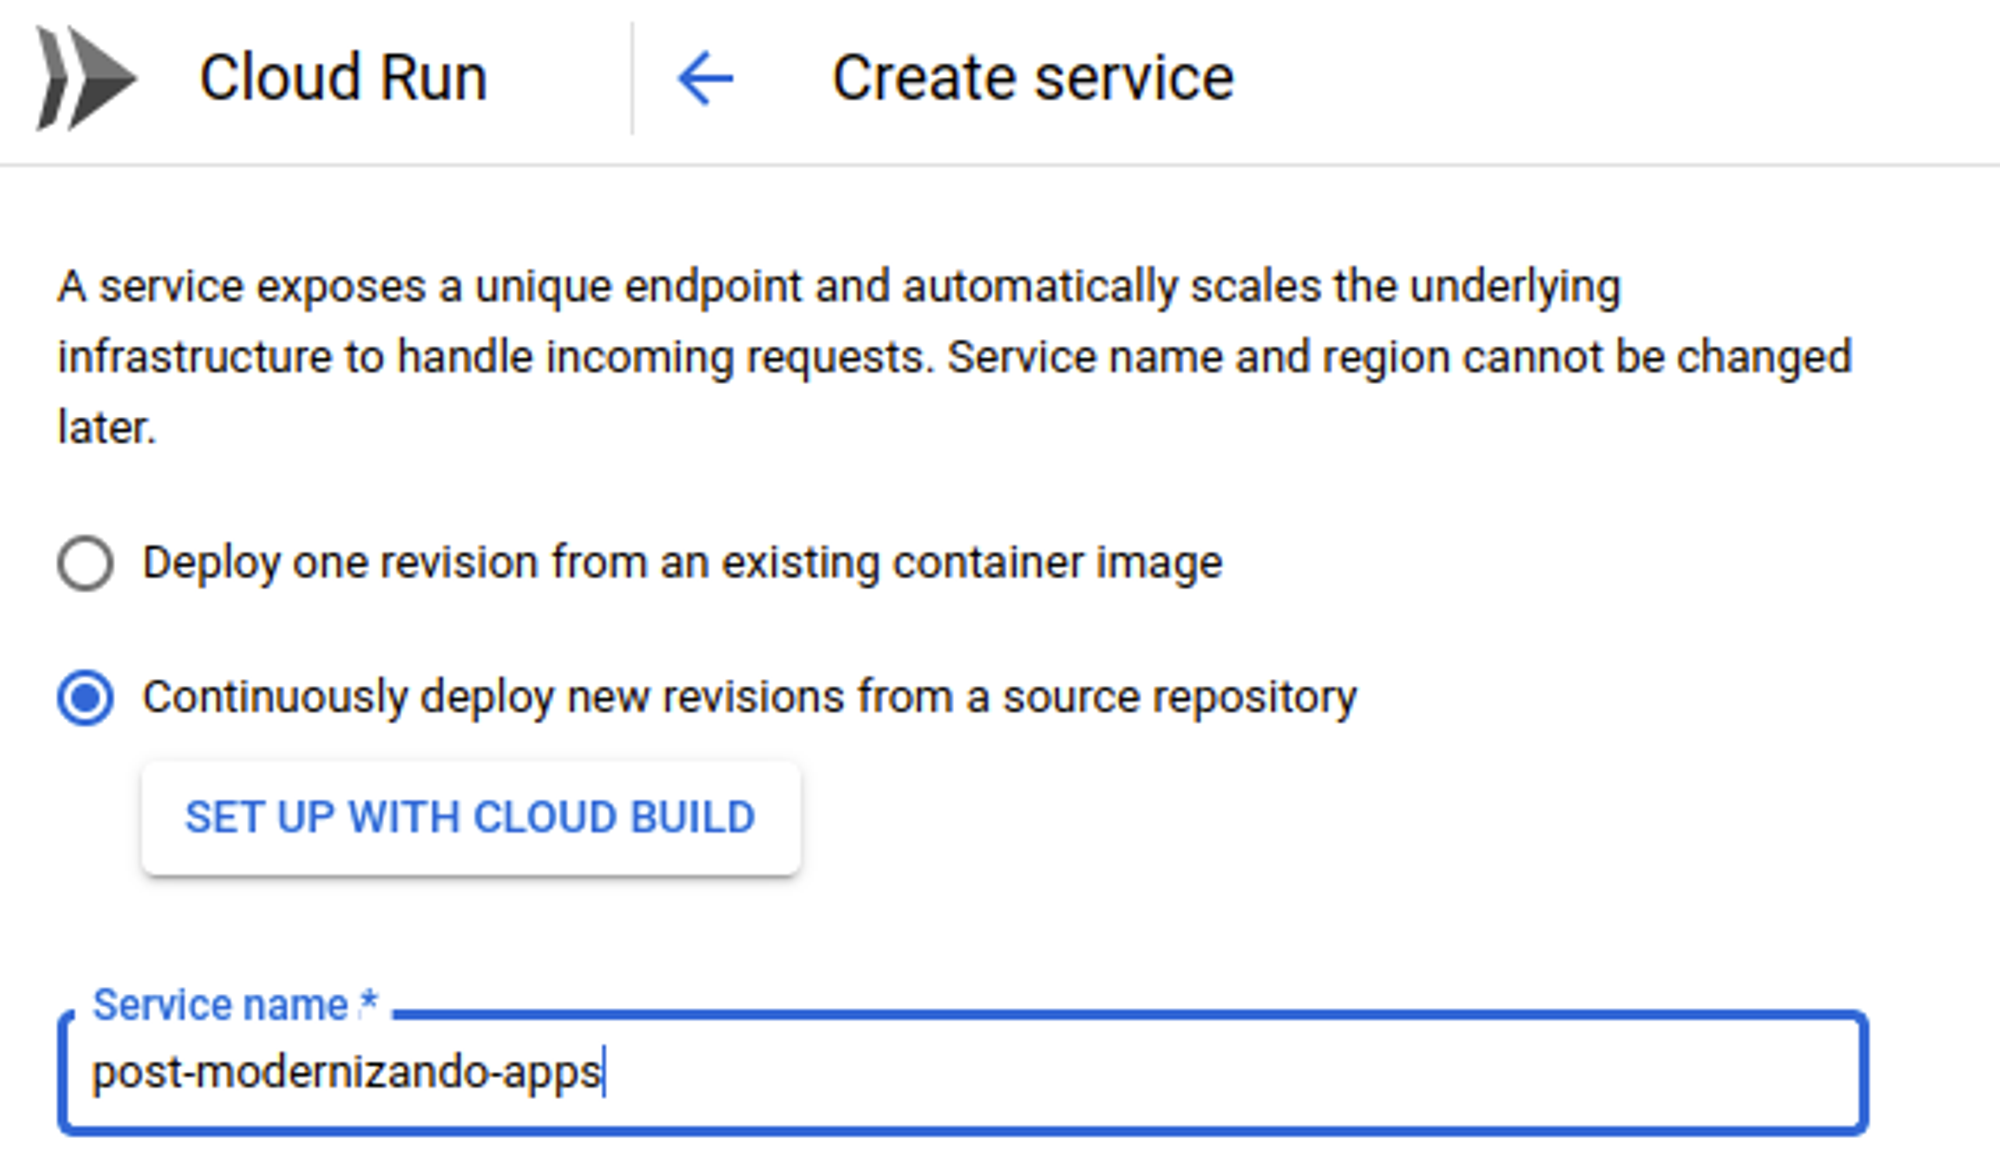
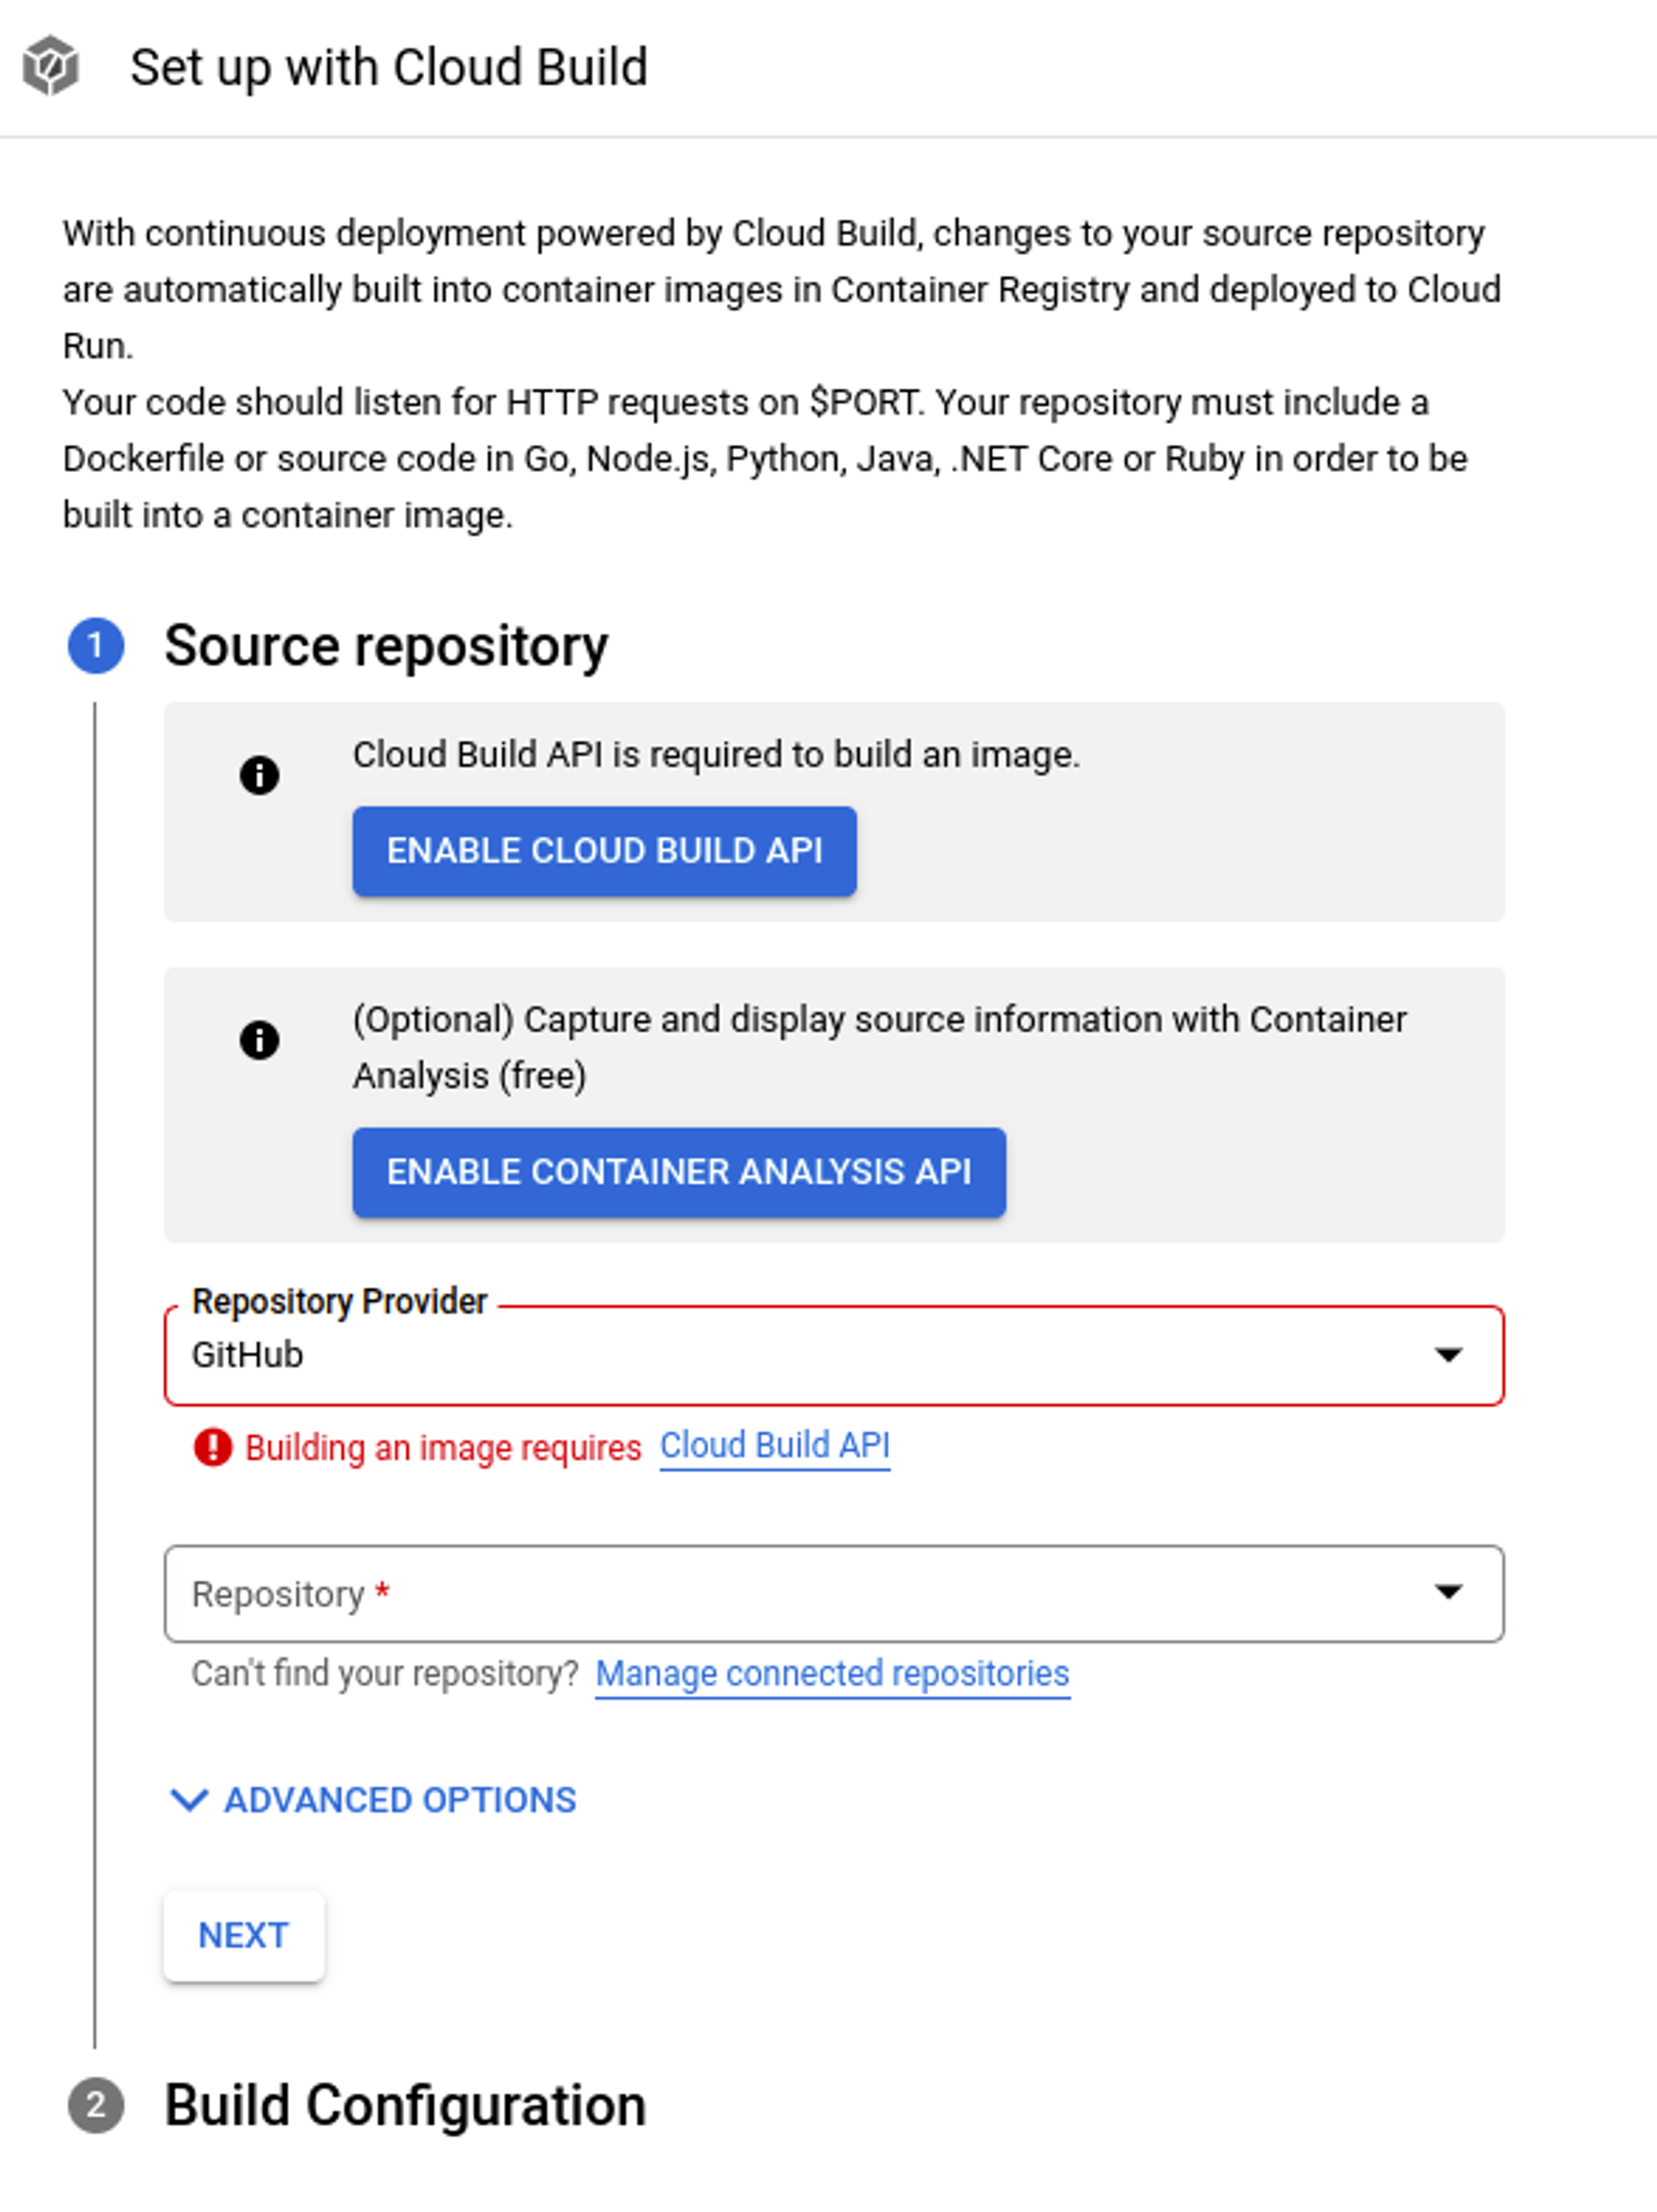
First, access the Cloud Run page and choose the option to create a new service. Then, choose the service name, select the second option and click on SET UP WITH CLOUD BUILD.
Then, activate the Cloud Build API by clicking on ENABLE CLOUD BUILD API.
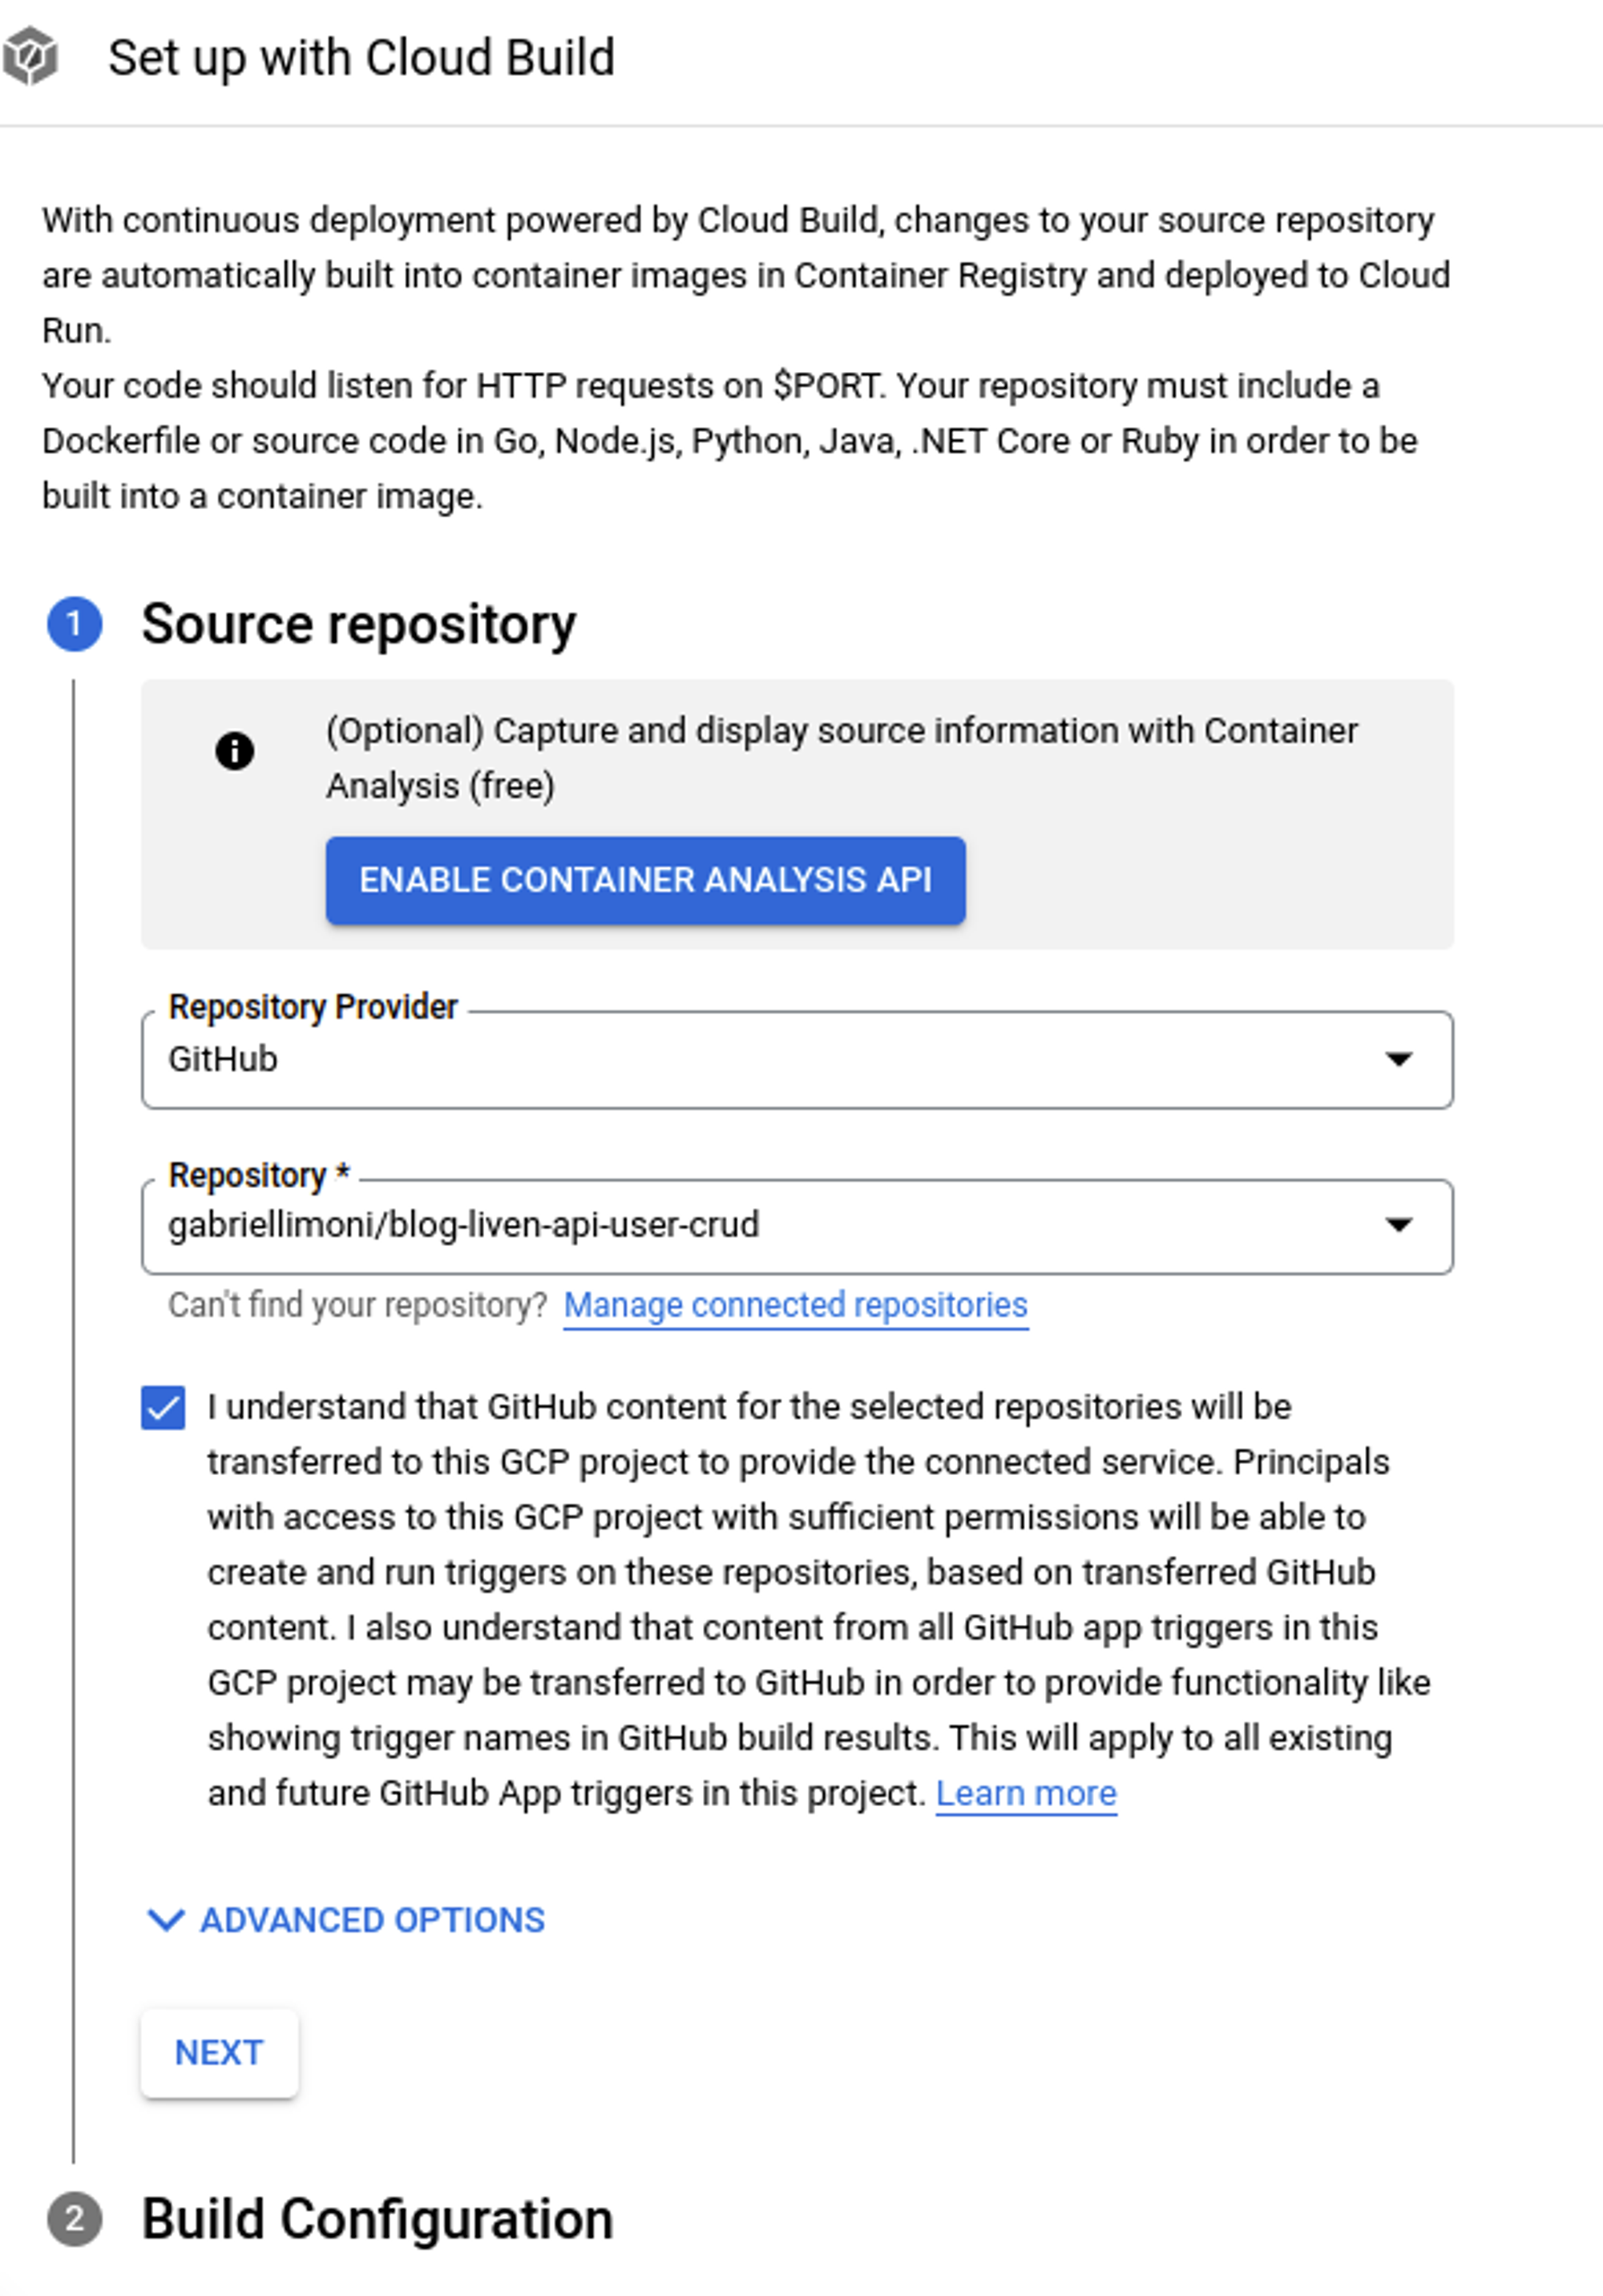
When it is done, click on Manage connected repositories. This chart should pop up to authenticate with GitHub. Authenticate yourself as usual with GitHub OAuth. After it, it will be requested an installation of cloud build on your repositories. Choose the repository you did the fork on the second step and keep on going.

With the Cloud Build installed on the repository, it should show up in the list to be selected. The repository setting with Cloud Build should look like this:
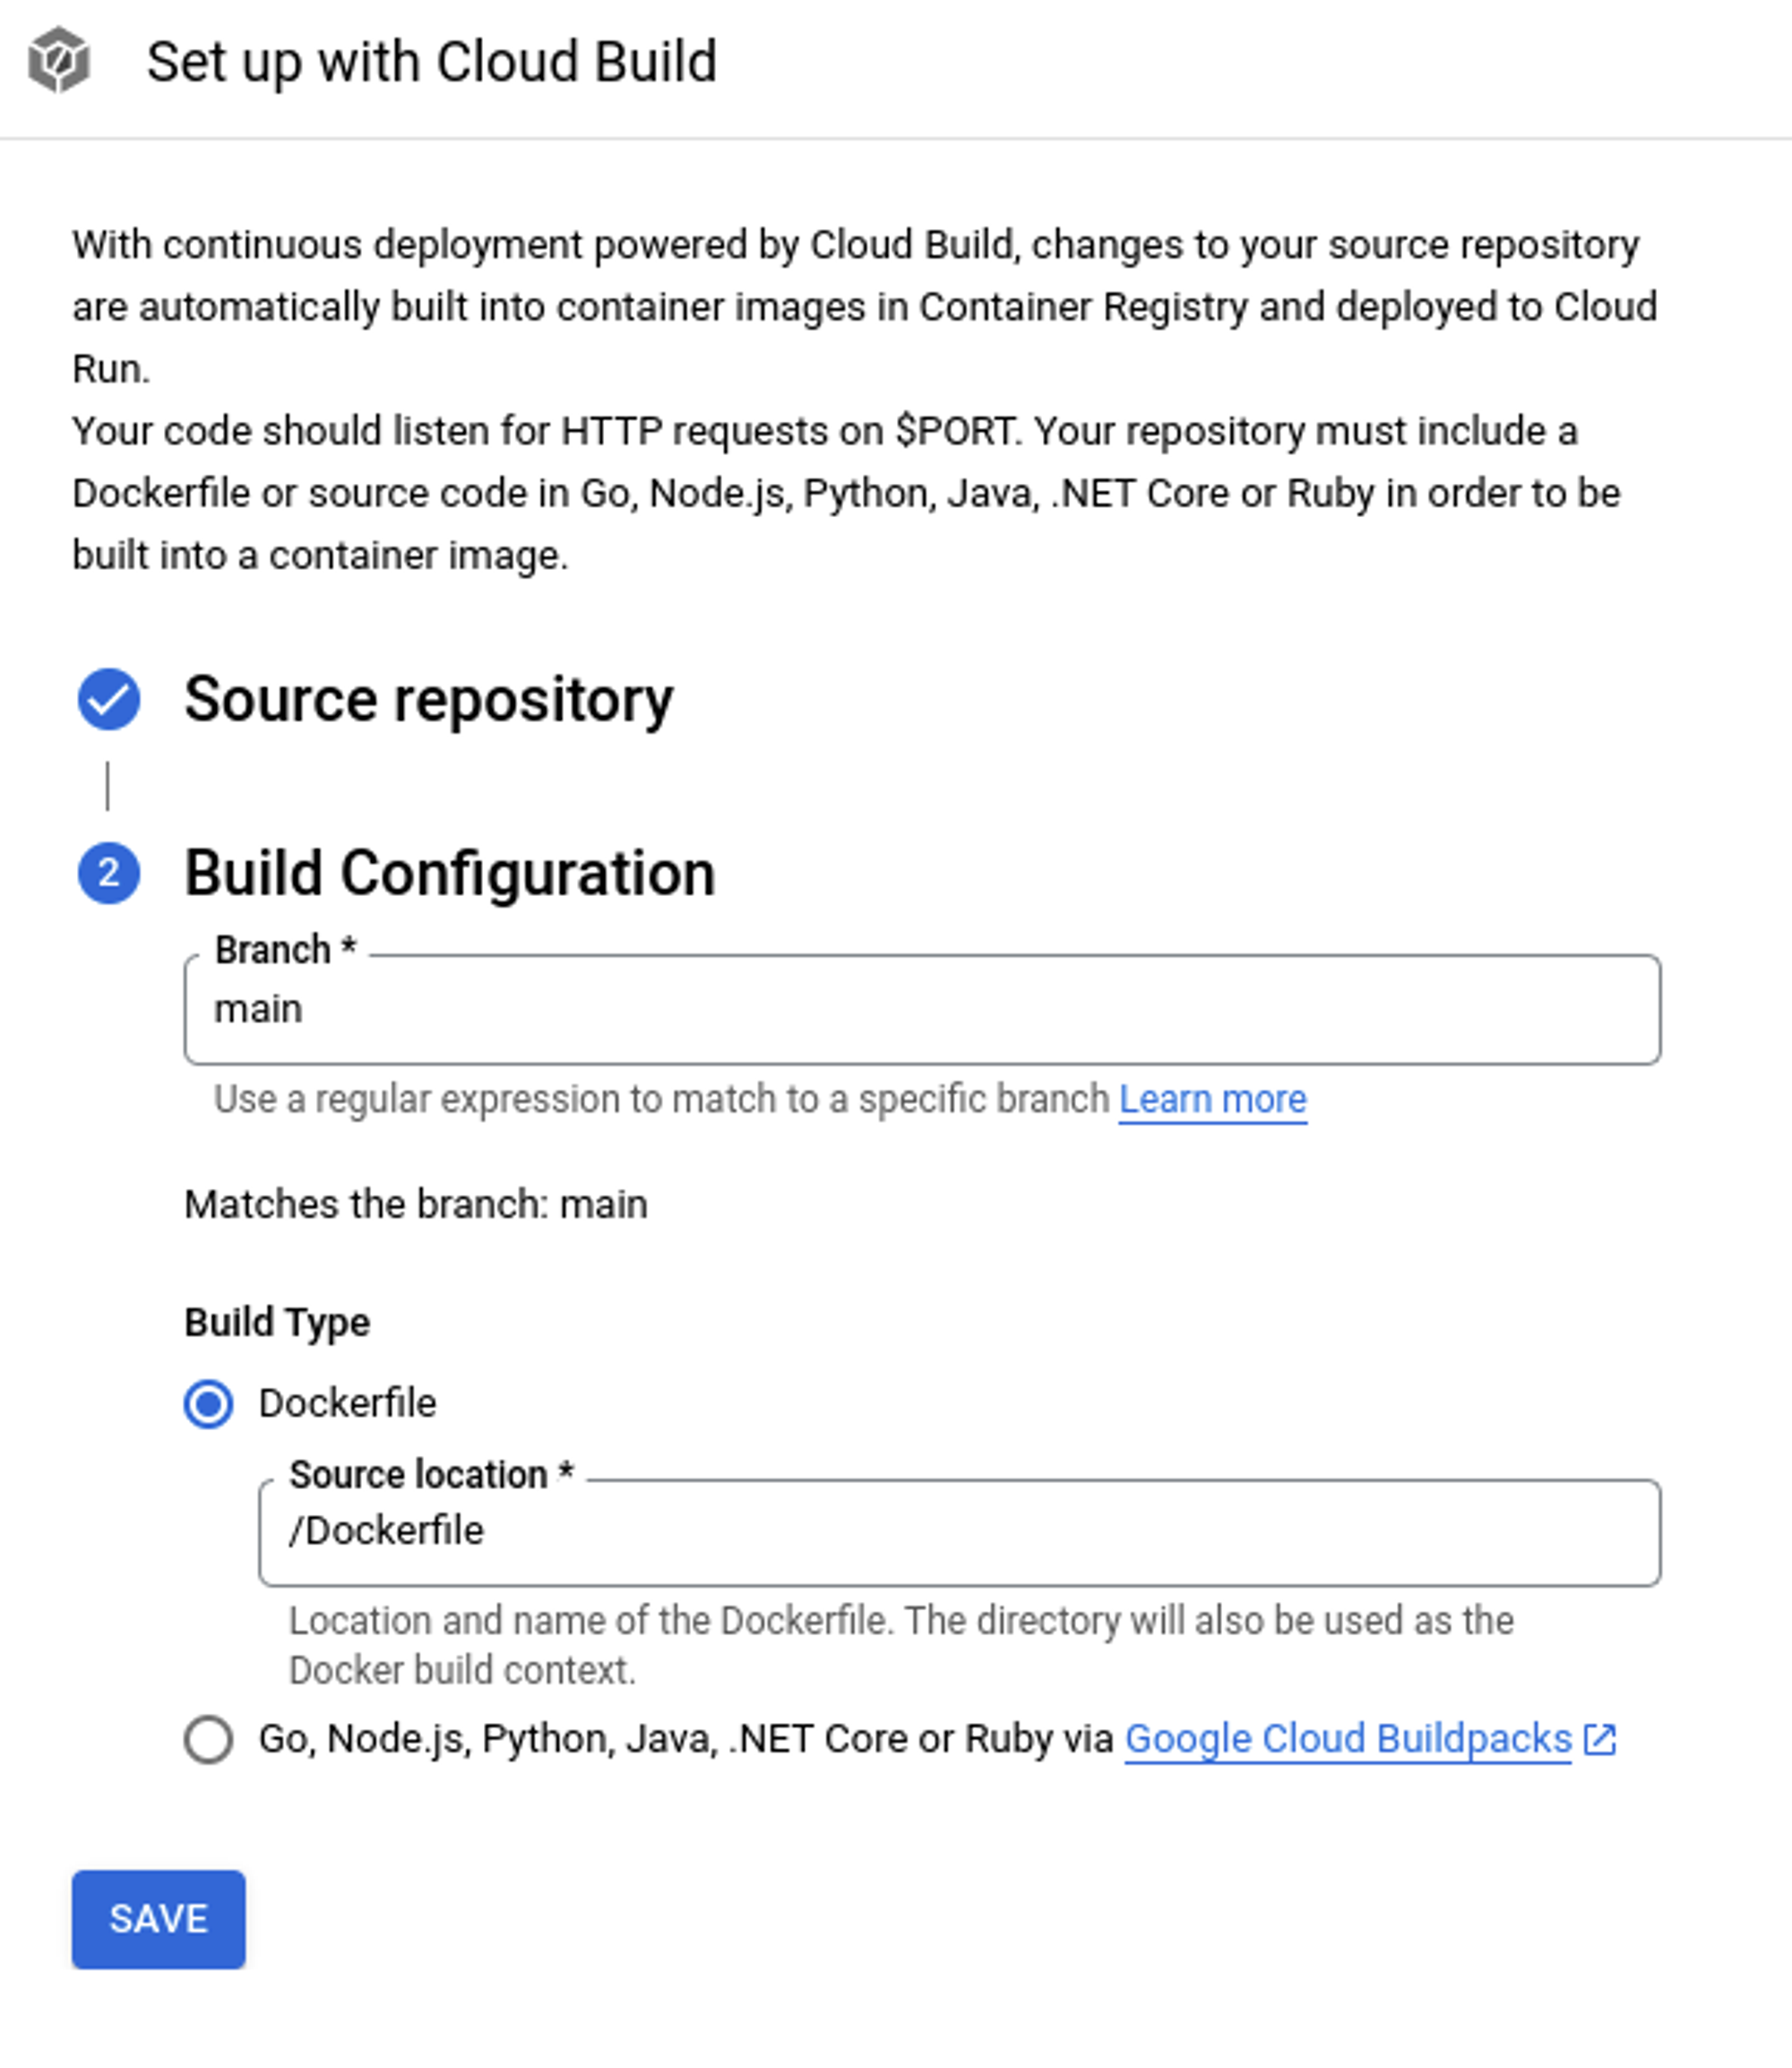
The Build settings set it up as the screenshot below. Basically, every push in the branch main will make a deployment using the Dockerfile that had been settled at the previous steps.
Saving this GitHub configuration, just set the MongoDB URL environment variable in the section marked red:
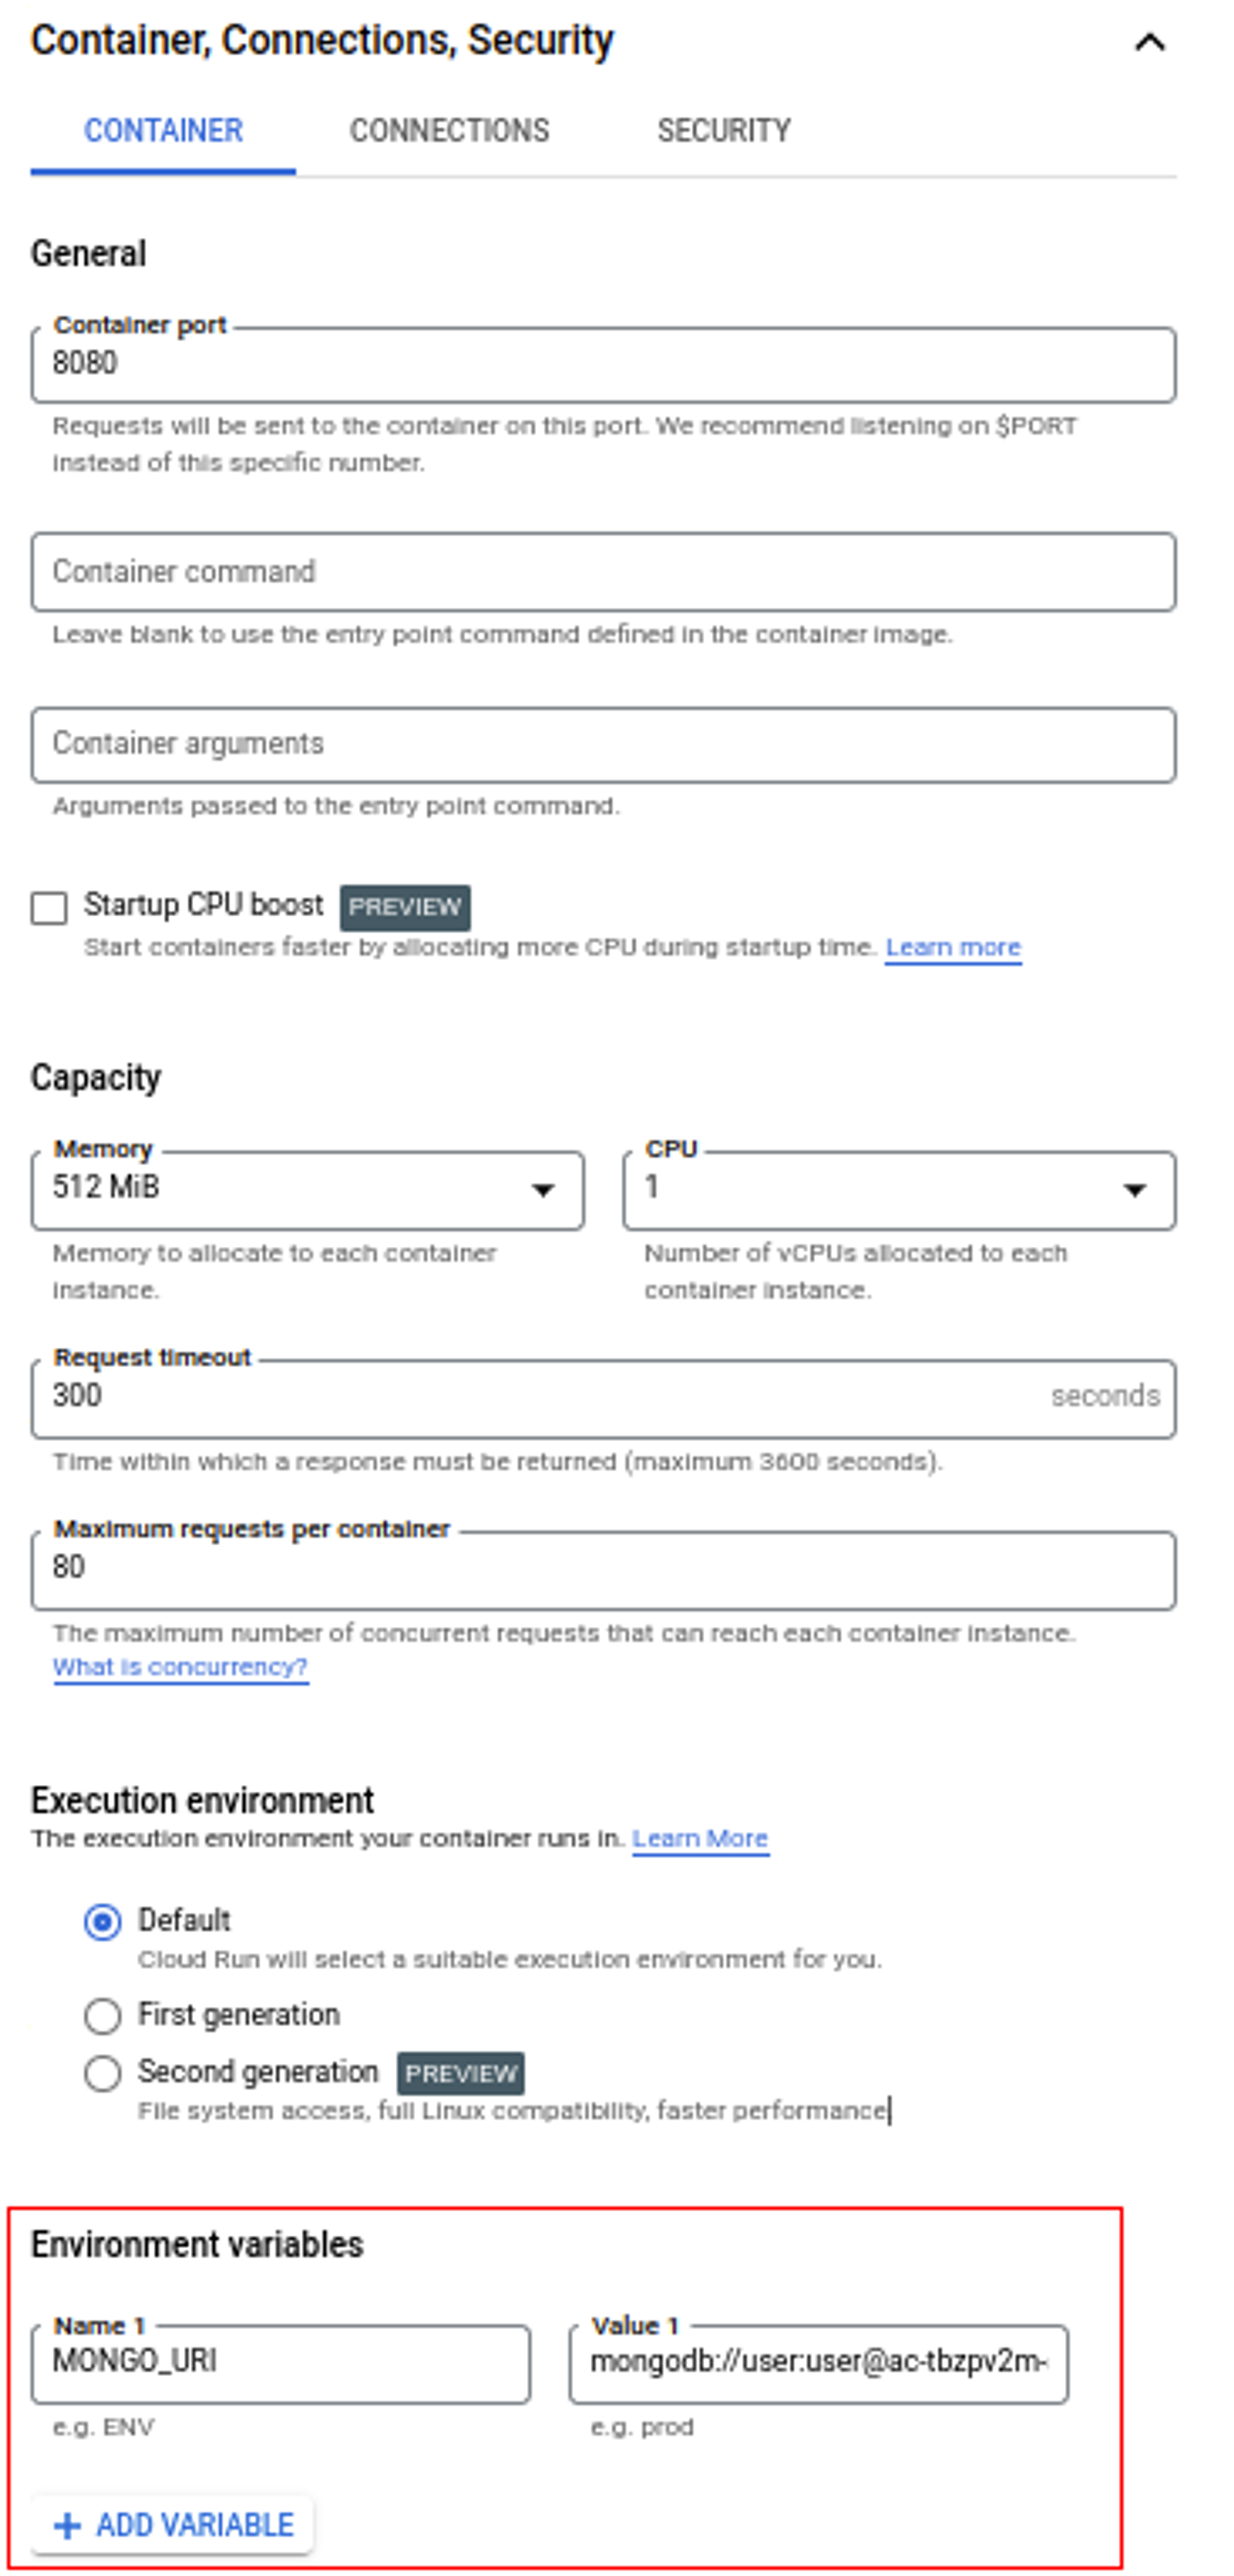
That being done, save the creation of the service form.
As soon as the service is created, you will see a screen with the form’s revision settings. If everything works out, after a few moments your screen should look like this:
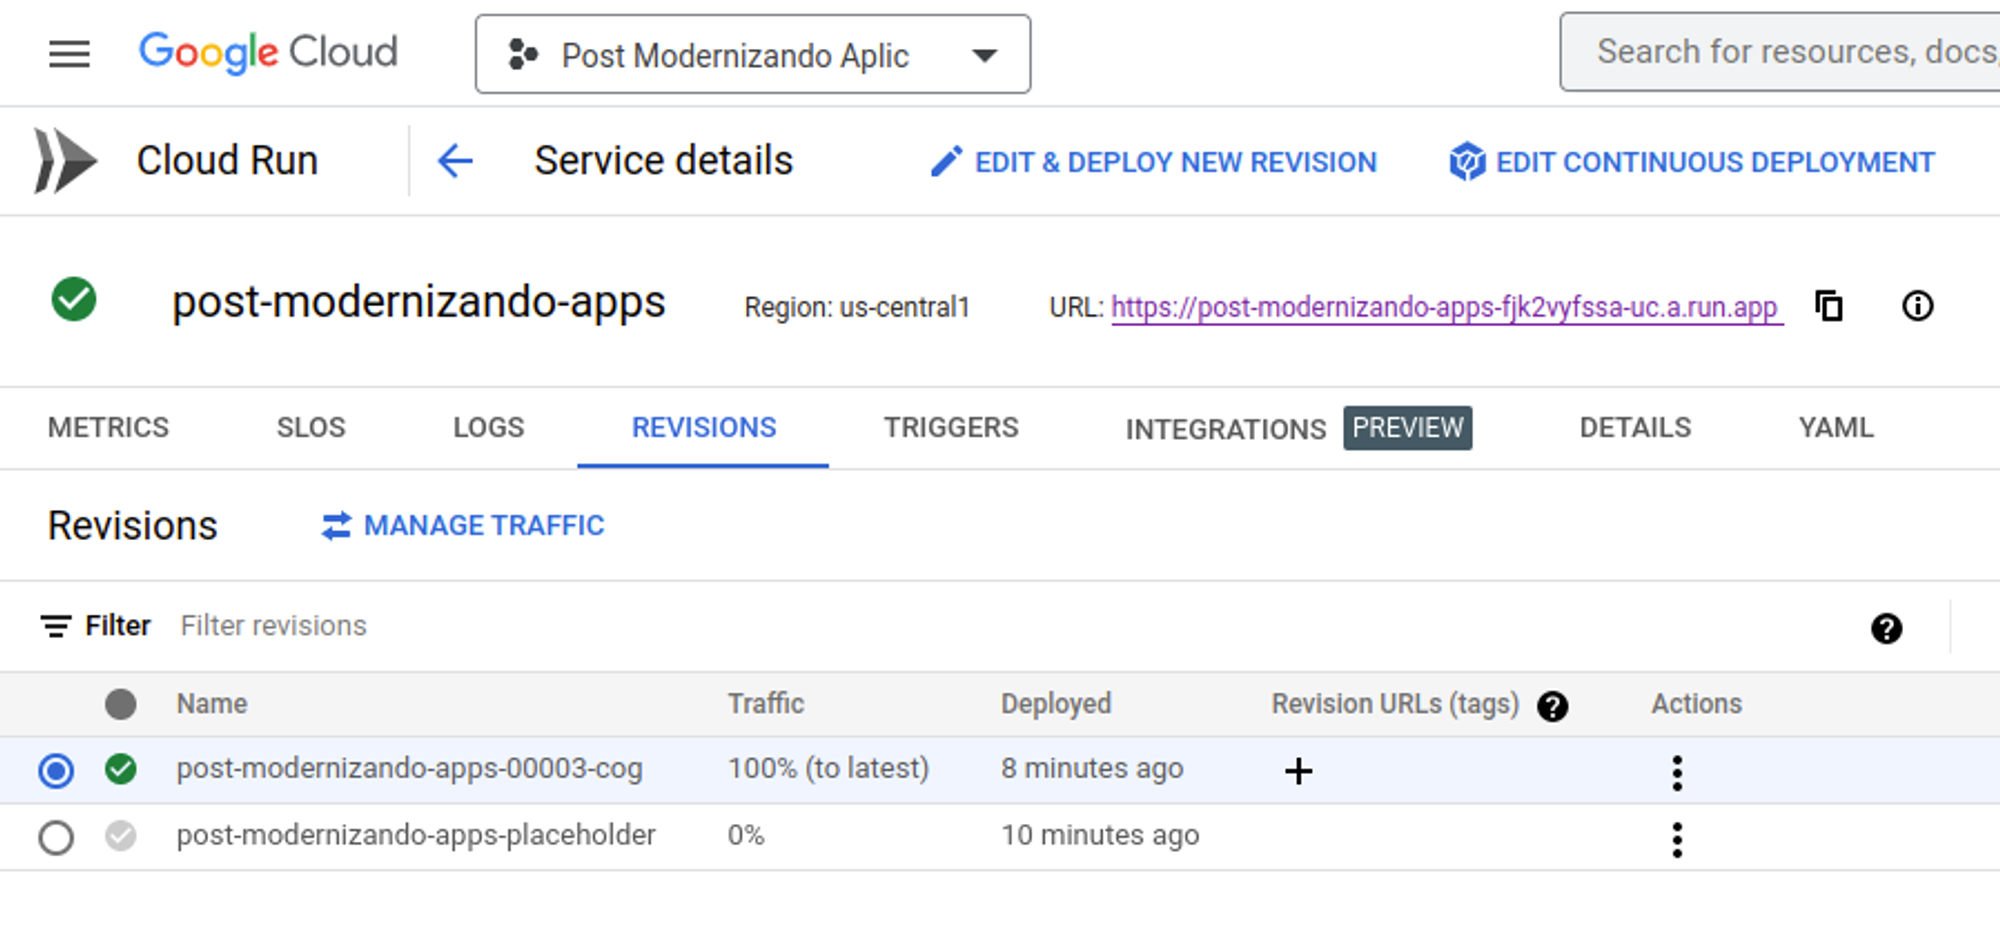
Take a look that we have a URL to access, it is already our application hosted on the cloud using the Cloud Run do GCP resource!
5. Testing the application on the cloud
With our application hosted, we can execute the HTTP requisitions as we did locally, but point out directly to the URL generated by Cloud Run. The file README.md has many examples of requisitions of the user’s CRUD. There is a GIF explaining it below:
Conclusion
In this article we could learn how to upgrade a Node.js application using many serverless cloud resources, such as Database as a Service and Platform as a Service by easier and quicker integrations among Github, Cloud Build, and Cloud Run.
It is important to highlight that this specific configuration works pretty well for an HTTP API that does not require long processing, this is not a silver bullet!
However, this tutorial should help in many cases, especially for small teams that do not have time to waste on infrastructure settings and updates.
There are many other cloud service providers beyond GCP, such as AWS, Azure, IBM, and so on. All of them have similar resources that make our lives and processes easier in terms of software development. It is up to every person, team, or organization to choose one or another.
The fundamental is: we can do much more in less time if we know the basics of modern resources that this cloud computing universe offers us!
Published by


Gabriel Limoni
Tech Leader and Fullstack Developer, helping people deliver value through technology.
Tech Leader and Fullstack Developer, helping people deliver value through technology.